

How To Send An Email In Mailchimp
MailChimp Newsletter 101: How to Send Emails to Your Subscribers
Tip: Keep it simple (and don't do it too often)
![]()
Note: This post is the last part of the 'MailChimp 101' series. If you haven't started using MailChimp yet, read Post 1 and Post 2 first.
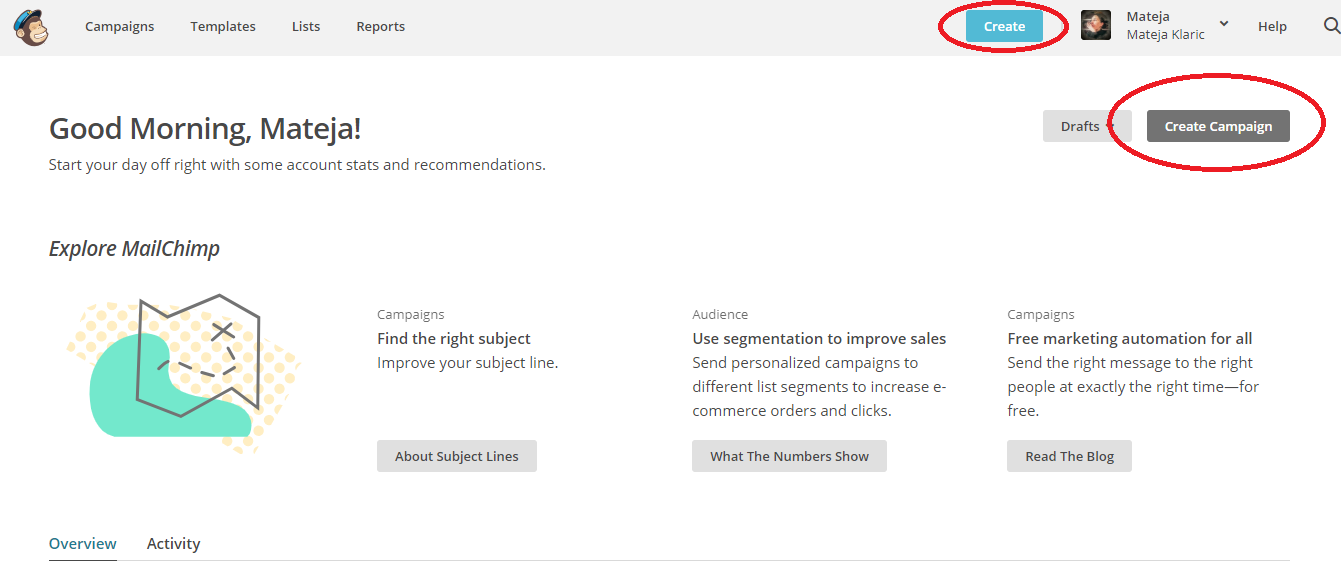
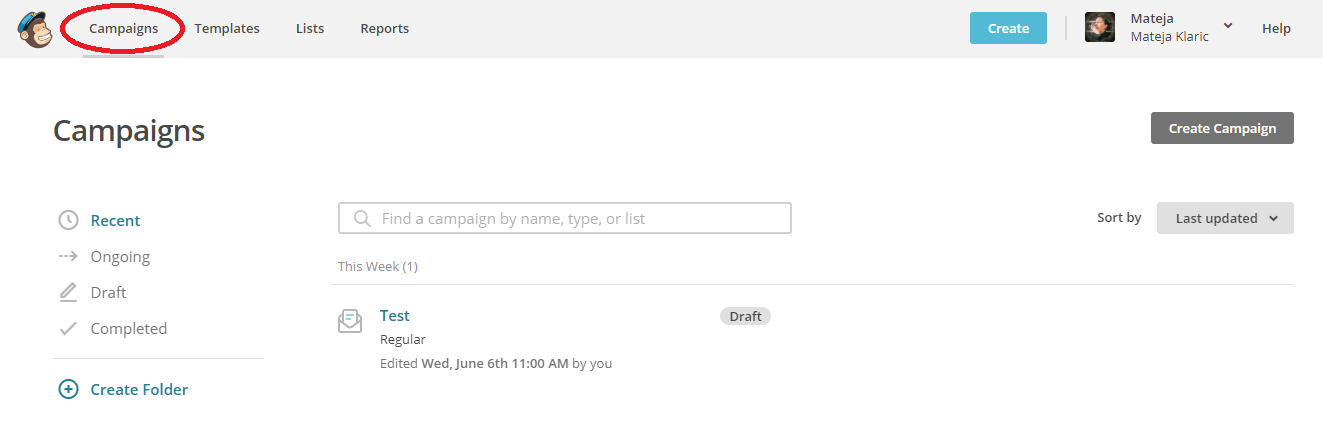
After you created your first list and subscription form, you can start sending emails to your subscribers. To do that, click on either 'Create' or 'Create Campaign' button — both will open the same pop-up window. UPDATE: The CREATE Button is now on the far left of the top menu.
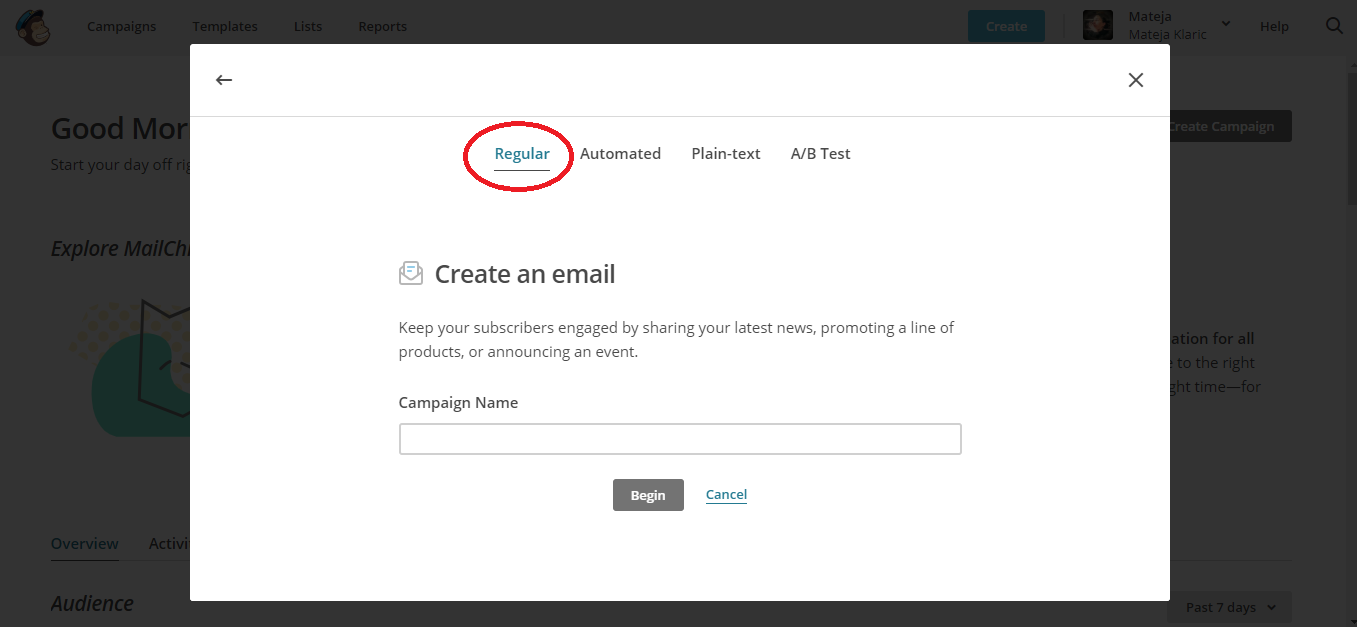
In the pop-up window, select 'Create an Email.'

This will open s e veral options — Regular, Automated, Plain-text, and A/B test. For a beginner, 'Regular' is all you need. Later on, when you are more comfortable with the whole thing and your list starts to grow, you can also explore 'Automated' and 'A/B test' options.
I do not advise using 'Plain Text,' though, since it's too limiting.
Give your campaign a name, such as 'Newsletter,' that will make it easy for you to know what the campaign was about. This name is just for you and your own personal use.
In the next step, though, you will have to put in the data that will be visible to your subscribers, namely, who sent them the newsletter (including your email address) and the subject line. So try to put yourself in the shoes of the recipients when you are filling this out.
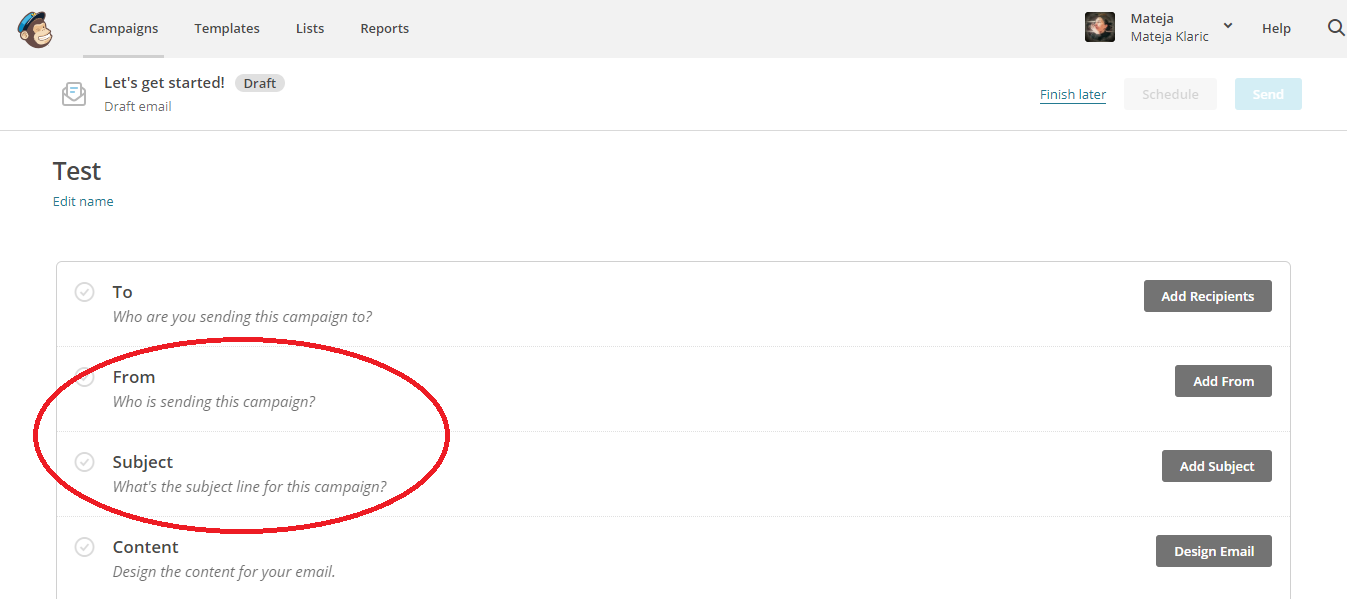
Click 'Add Recipients' in the first (To) section and choose the list of subscribers you wish to send your newsletter to.
Next, and before you continue with 'Content,' scroll down to where you can choose to also share your newsletter on your social media accounts. You can turn this option on for both Facebook and Twitter.
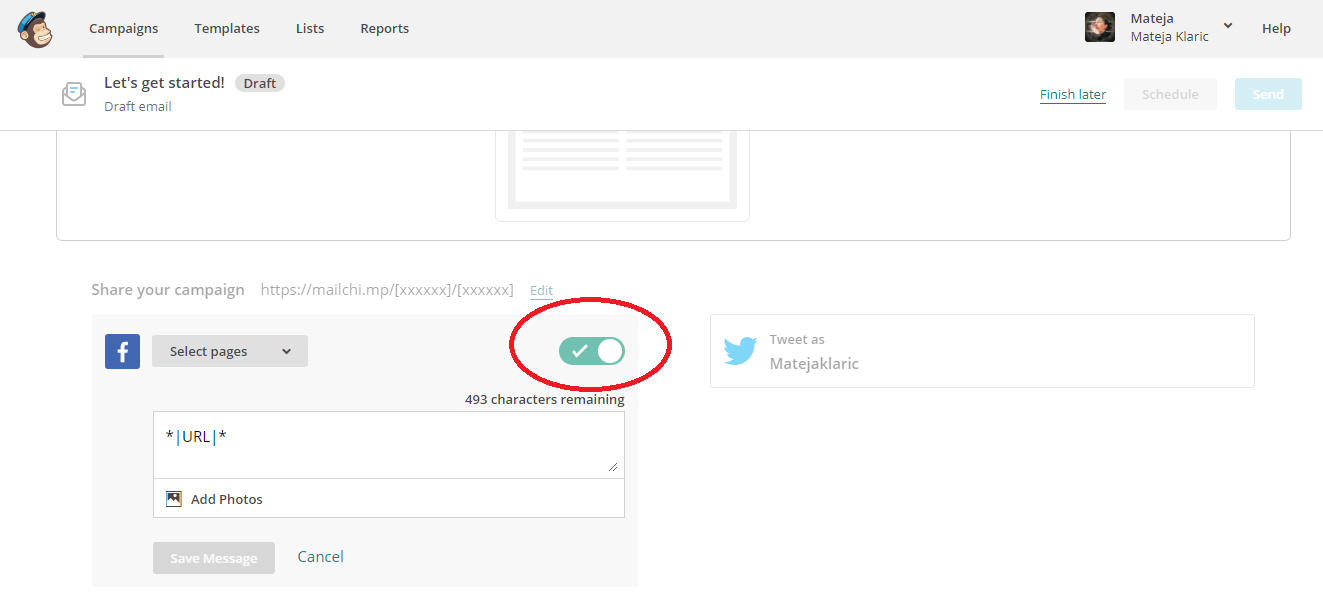
You will need to connect social accounts before creating campaigns to be able to use this option. To do that, click your account name and then 'Profile.' Once there, open 'Integrations.'

To get back to your campaign/newsletter, simply click Campaigns on the top left menu, and then open the campaign draft to continue.
The time to create your newsletter has finally come! Yay! But since this is MailChimp, you better prepare yourself for a lot more work.
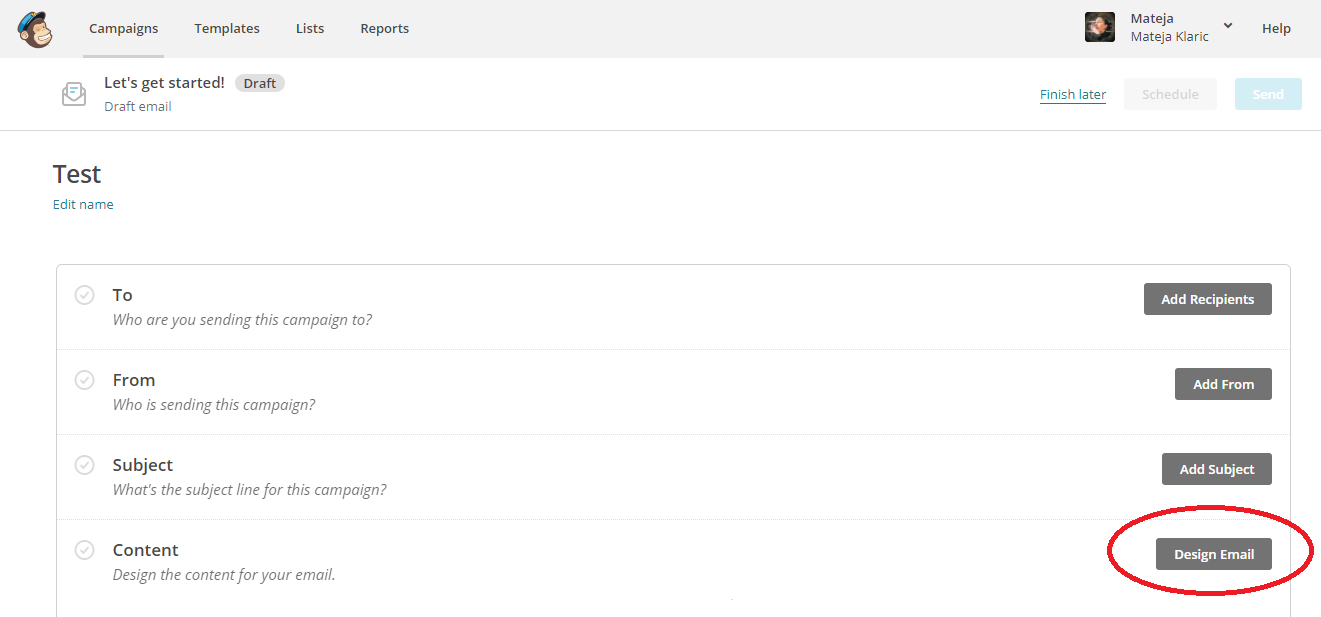
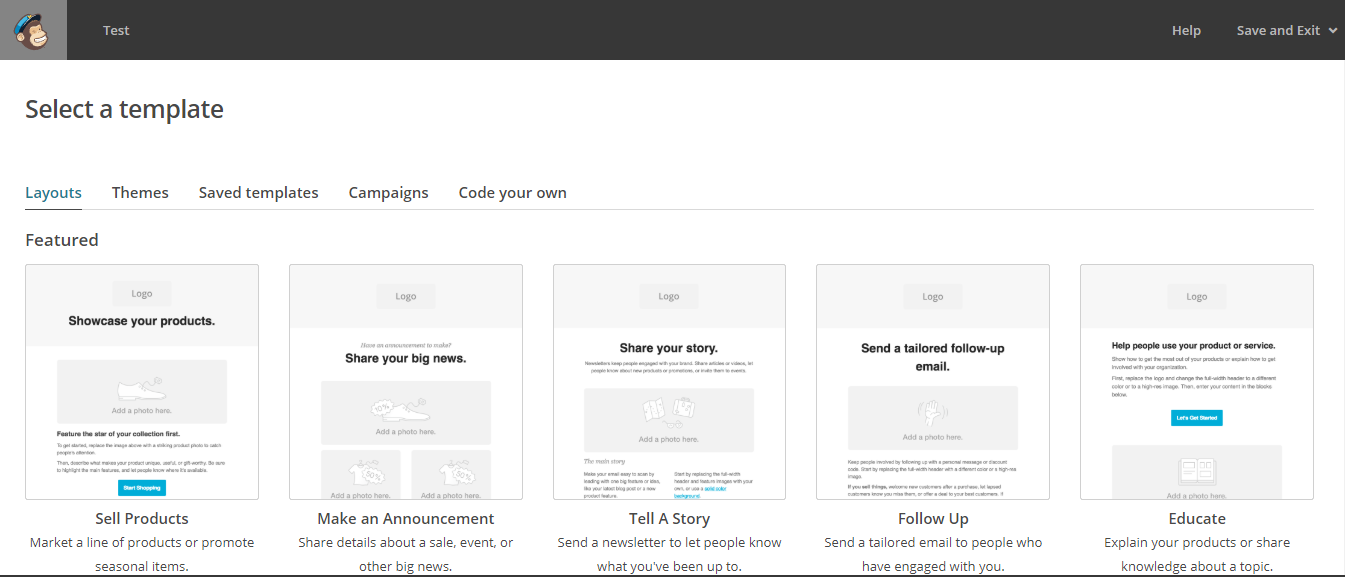
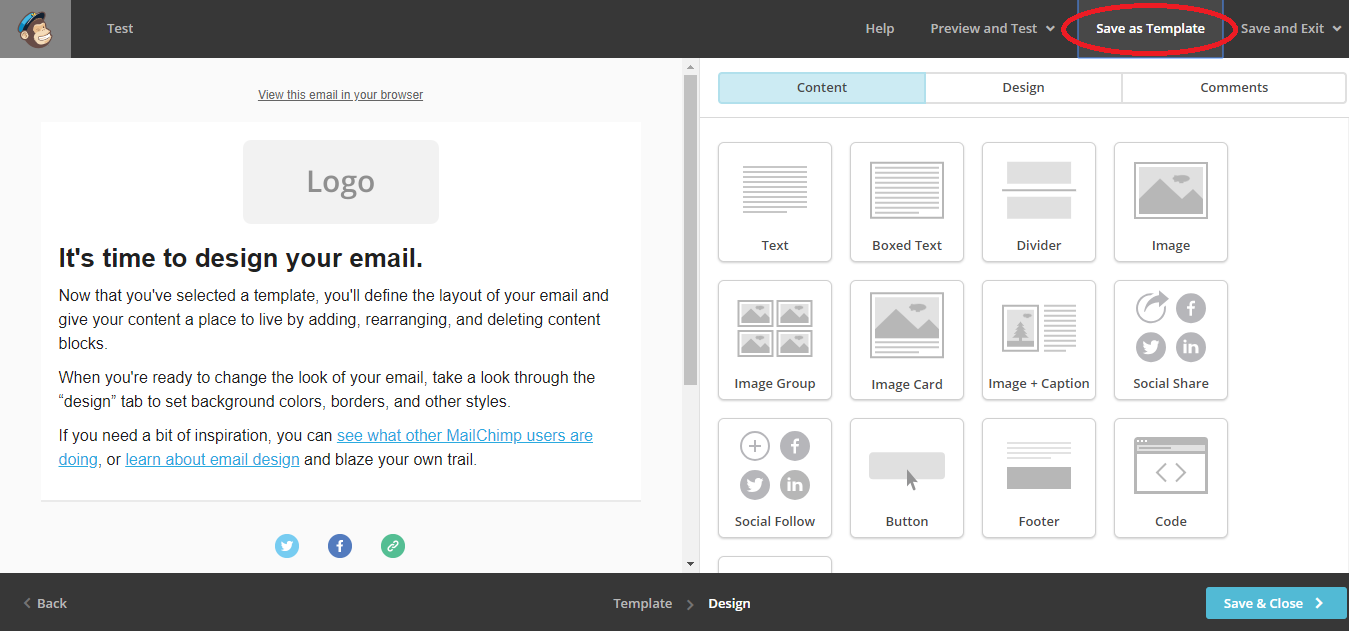
Go to 'Content' and then click 'Design Email.' This will open numerous options that may seem overwhelming. There will be layouts and themes for all sorts of different purposes, including the option to code your own email.
This can be great if you are a designer or have a shop, but as a writer who is only going to send out an occasional newsletter, you don't need most of this. Based on my experience, it works best to go with the simplest possible option.
If you want to know why, read this post:
You will be able to add and remove elements (pics, text blocks etc.) in the MailChimp newsletter editor anyway, so it doesn't make much difference which layout you choose — other than not having to waste time on removing too many blocks when you opt for the simplest possible layout.
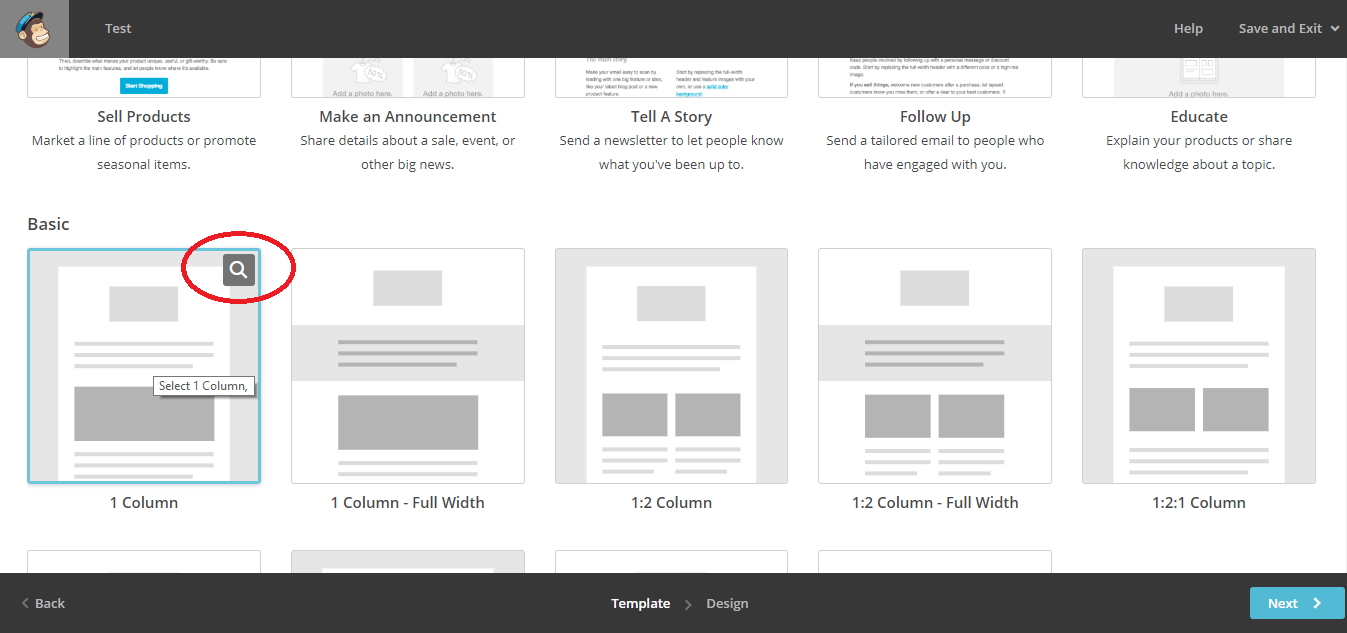
For the purpose of this post, I selected the 'Basic' / '1 Column' layout.
Tip: You can also check the preview for every template before you select it by clicking the search icon in the top right corner.
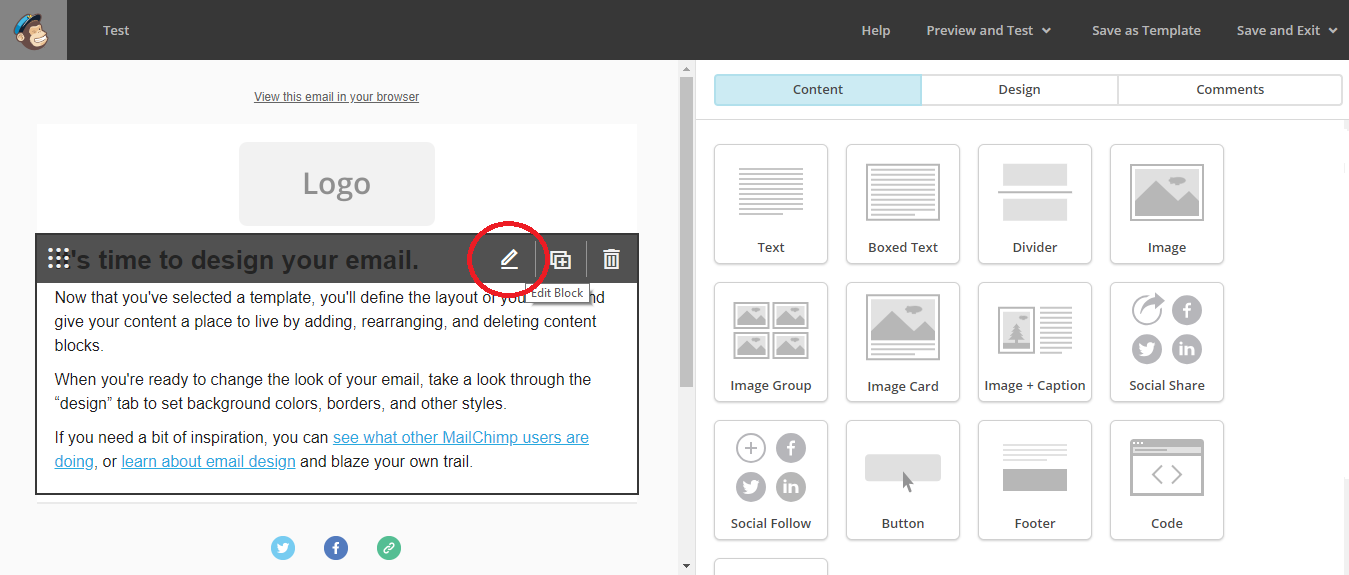
Clicking the selected layout will take you to the drag and drop editor where you can design your newsletter. You will see the preview of the newsletter on the left, and drag and drop builder/editor on the right.
You can build your email using text and picture blocks, buttons to create calls to action, and social icons to encourage following or sharing.
You'll be able to start writing and editing your email content by placing the cursor on the selected text block on the left and then clicking the pencil icon. This will open a word processor with the interface similar to MS Word.
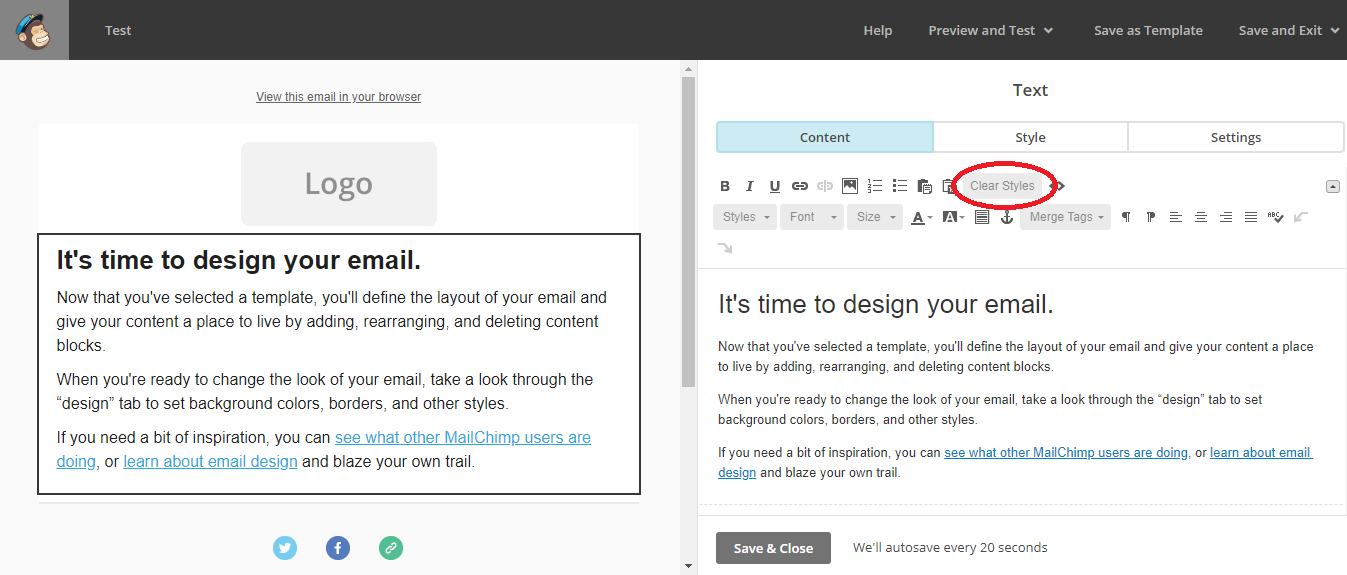
Tip: Sometimes, there can be issues and glitches with text formatting in MailChimp. In such cases, use the 'Clear Style' option to erase the formatting.
MailChimp will automatically keep saving your work, but nevertheless click 'Save & Close' button after you're done.
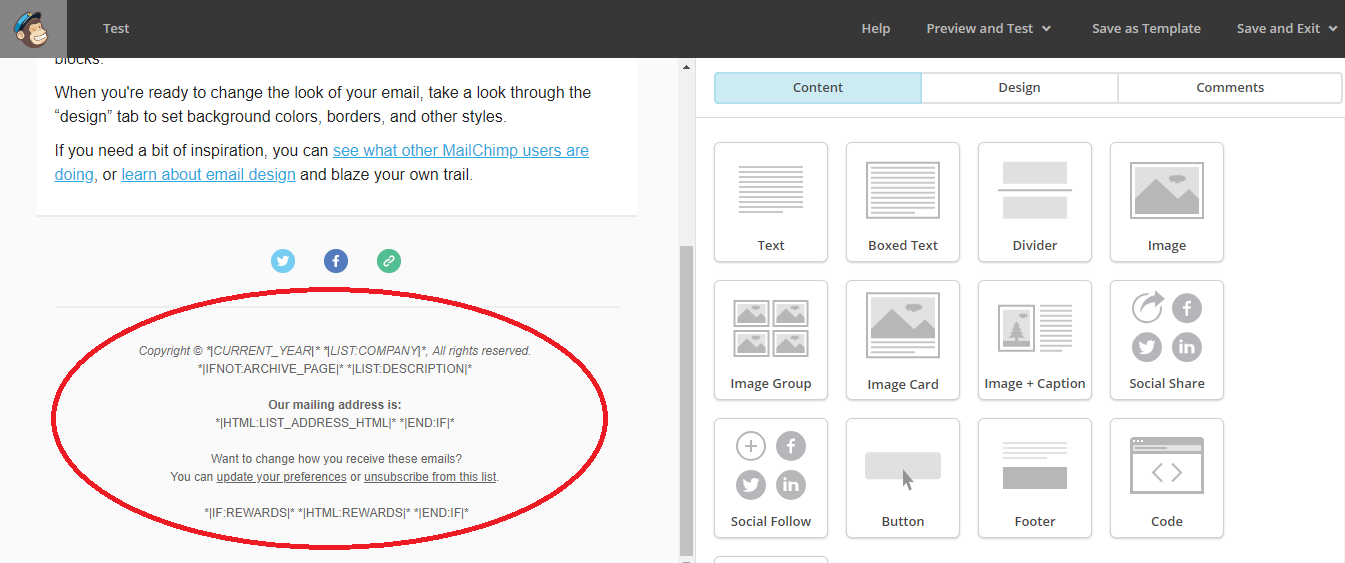
Now take care of each block. To link the social media icons properly, for instance, click on that block and then insert the links to your accounts.
Tip: Unless you know how to code, keep the code in the footer alone or you might mess it up.
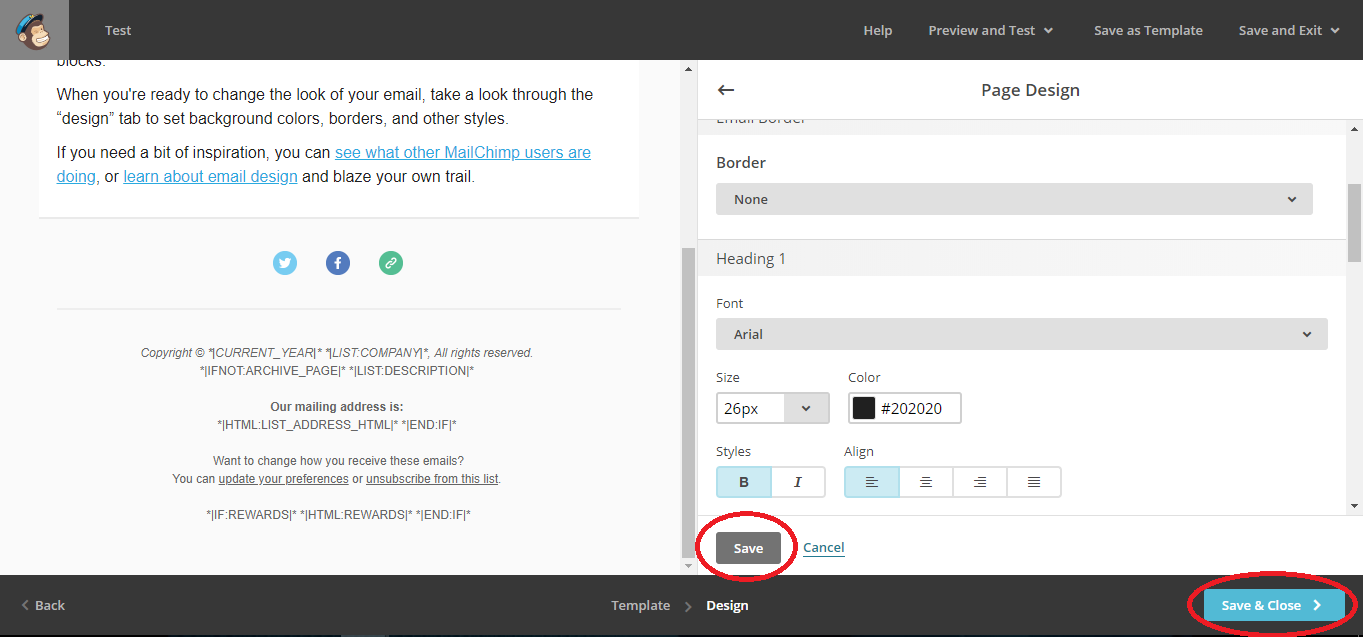
When done, you can apply different design options to the template. With no blocks selected, click Design in the top right header section. This will open the options to design every part of the newsletter.
You can easily spend hours playing around with trying out different fonts and colors. Unless you have too much time on your hands, try to resist the temptation and keep in mind that the simplest solution often work best.
Sticking to the MailChimp default options will do for a start and you can always take the time to explore and experiment later on.

Tip: Click 'Save' after you finish designing each section but do NOT click 'Save & Close' button in the bottom right corner just yet!
When you are reasonably happy with the content and design of your newsletter, open 'Preview & Test' options in the main menu. You can send yourself a test email to see how it will look in the subscribers' mailboxes.
Tip: Taking the time to send yourself a test email is highly recommended.

It's also a good idea to use 'Link Checker' in the 'Preview and Test' section to make sure all of the links in your email lead to where they are supposed to.
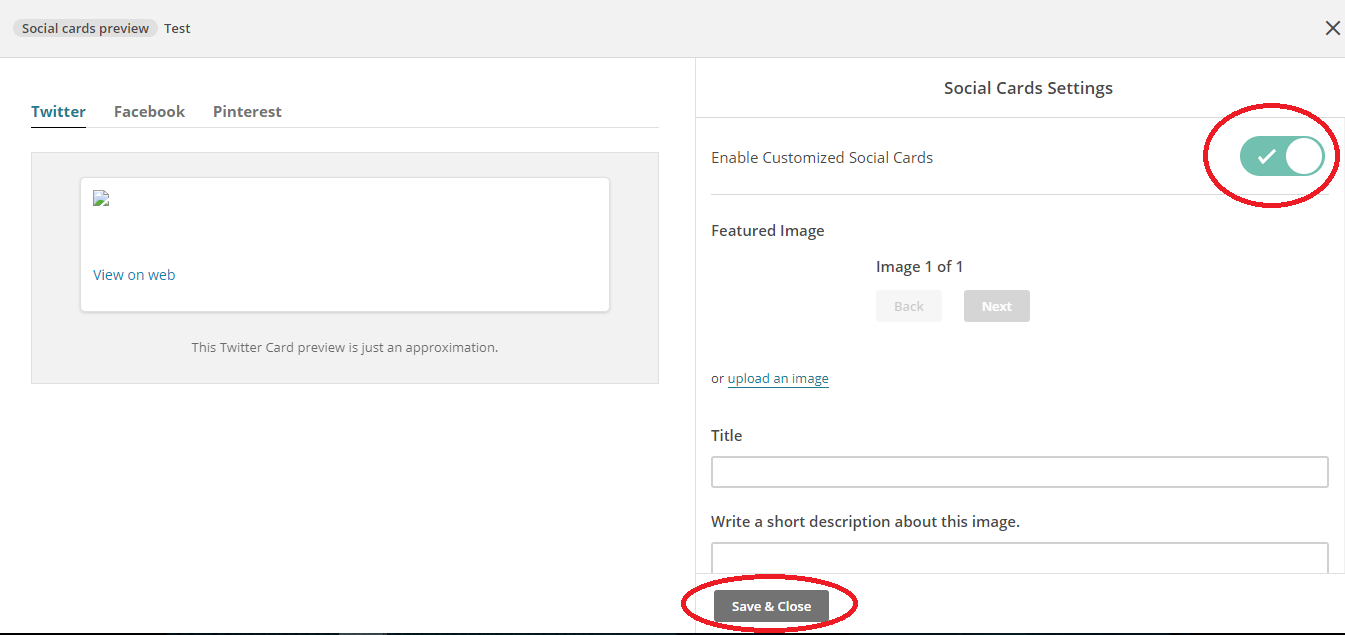
Finally, take care of the 'Social Cards.' Clicking 'Social Cards' will open another editor. There, you can select an image you'd like to display when MailChimp shares your newsletter on social media.
Enabling social cards will allow you to select the images and write the accompanying text. Make sure to click 'Save & Close' after you're done.
Tip: Since you probably won't wish to go through the same torture every time you'll send a newsletter, save your work as a template. This way you'll be able to use it in the future and won't have to design it all over again.
Now you can finally click 'Save & Close' button in the bottom right corner. If MailChimp detects any issues with your newsletter, it will let you know about that and you will have to resolve them before being able to click 'Send.'
Note: You can see 'MonkeyReward' badge among the issues in the pic below. This means that the MailChimp logo is missing and with free accounts, their logo is a required part of every email you send. If you don't add it, it will be added automatically so you don't have to worry about this.
If there are no other issues, hit 'Send' and you're done!

This concludes the MailChimp 101 series for absolute beginners!
How To Send An Email In Mailchimp
Source: https://writingcooperative.com/mailchimp-newsletter-101-how-to-send-emails-to-your-subscribers-469406ed5ff2
Posted by: pyattsawn1947.blogspot.com
0 Response to "How To Send An Email In Mailchimp"
Post a Comment