

How To Create Svg Icons
How to create SVG-ready icon symbols in Sketch
![]()

 H ave you ever created an icon in Sketch and after exporting it, one of the developers on your team sends you a screenshot of a strange, distorted version of this icon? I feel like a lot of designers are struggling with this, at least I have. I have also tried out many ways to setup icons in Sketch for different projects, some of them making it necessary that I prepare the icons every time the developers needed something.
In this article I want to share my experiences and show you, what I consider the best way for me to create icon symbols and libraries. I arrived there by constantly adapting to the feedback from the developers and educating myself about the SVG specification itself and the way the Sketch export works. This setup will allow you to
- have icon symbols with color overrides using shared styles
- export icons directly to SVG without having to clean them up
- maintain the original path for future reference
All this is possible using only Sketch with the official Sketch plugin "SVGO compressor". No jumping between Illustrator and Sketch, no extra preparation for export — once the library stands, you do not need to touch it, except for design reasons.
What is SVG?
SVG stands for „Scalable Vector Graphics". It is a way to describe vector information in XML format, so every SVG is a readable text file. Vector graphics can be scaled without loosing quality and since they are code, they can dynamically be manipulated and animated. This is perfect for the use of icons and illustration in the web — and this is what SVG is made for.
If you want to learn more about SVG, you can start at w3schools.com, they have a great beginner friendly documentation of all relevant web technologies, like HTML, JS, CSS and SVG as well.
How Sketch exports SVGs
SVG files are different from bitmap image files like .png or .jpg. The are described in a markup text you can view by opening SVG files in any text editor. This markup will be integrated in the code that defines the application and rendered by the browser. This means, that during export, what we see in Sketch will be translated to a text representation of path and style information. Since the Sketch vector tools give us slightly other options than the SVG markup provides, Sketch has to recalculate information, and the result might not always be right.
Additionally, SVGs can sometimes depend on other files, like fonts or bitmap images, if they are integrated in the design. Those files will be referenced in the markup and if the path of the file location changes, they can not be displayed.
The next two examples show two very common issues I have experienced when exporting SVGs.
Broken Text


When we use text in icons or illustrations, this text will not automatically be converted to outlines when exporting them. The text will be integrated in form of a text tag, which is provided with the necessary styling information and the name of the font to be used. If the font can not be found, like in the picture above, a standard system font is used. Leaving text information in an SVG might be beneficial, if the text will be changed dynamically later on, but this does not come up very often. In all other cases, the text should be converted to outlines.
Broken Borders


Of course SVG elements can have strokes in different widths. But Sketch allows us more than that — we can set the border to be centered, outside or inside the shape we created, and we can open up paths with the snipping tool. SVG does not know these options, so when exporting these shapes, Sketch has to recalculate those settings. This usually works fine for simple shapes, but if the element is more complex, it can break and look as shown above. To fix this, you can also use the "Convert to Outline" option.
TMI — Too Much Information
The standard Sketch SVG export is very cluttered. It contains descriptions and comments and a lot of other information, that is not necessary for the SVG to be rendered correctly. Also, the description tag inside the SVG can falsely end up as the search engine description of you website. This stuff can be deleted manually, but it is very tedious. To prevent this you should use the SVGO plugin, which is described in a little more detail below.
In a nutshell — the problem is that Sketch vector tools work different from how the SVG markup describes them. Therefore, the vector data might be interpreted very differently in the browser form what we see in Sketch. In general, you can describe Text, Masking information, gradients, shadows and much more with SVG. But the more complex your element is, the more likely it gets that there will be an issue.
Creating an Icon Library
This proposition will give you icon symbols in Sketch, including color overrides and the possibility of directly being able to export the icons for the developers. Also, if your team uses Zeplin (which is a great tool for design handover), the developers will be able to download the icons directly from your design. Except for the SVGO plugin, which is maintained by Bohemian Coding itself, you do not need any extra plugins or tools.
Step 1 — The SVGO Compressor Plugin
This is an official Sketch plugin that will Mari-Kondo your SVGs when you export them. Unnecessary information will automatically be deleted (they do not spark joy) and path information will be simplified. It is an implementation of the console application SVGO (SVG Optimizer). You can try it out by comparing an SVG Export with and without the Plugin. It should look something like this:
As you can see, the resulting code has way less elements than the one we started out with. We merely kept information about the size of the icon and the path points — if the fill color of the icon would not have been black, we would see the hex code of the fill color as an attribute on the path tag. There is no room for false rendering or misplaced information.
Pro Tip: If your developers still are not happy — show them the settings file for the SVGO plugin — you have many options on how the plugin compresses the SVG, what information it deletes and what it leaves in.
Step 2 — Setup your Icons in Sketch
1. One Artboard per Icon
If you export an artboard instead of a slice or a single element, it gives the SVG the right height and width information for your „icon box". So setup all your icons on single artboards and define an SVG export for all of them.
2. Keeping Path Information for The Future

Converting borders to outlines and flattening shapes deletes path information you might need in the future, if you want to create similar icons or differently sized versions of this one. If you need to keep the path information for future reference, group all elements of the icon, copy them and set one of the folders to be invisible. You can keep it on the artboard — Sketch ignores invisible layers when exporting SVGs.
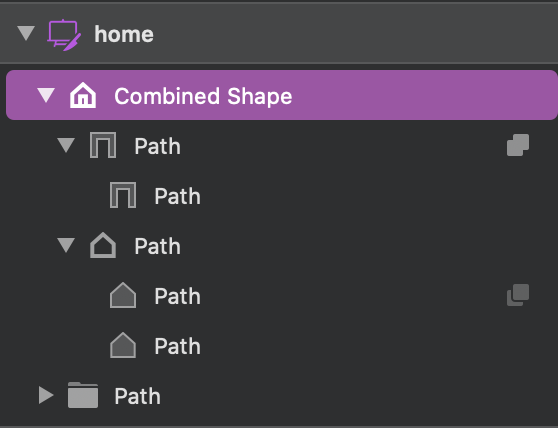
3. One Single Shape
If you have your Icon designed and are happy with it, the next step is to simplify the shape.
- Convert all shapes to outlines.
- Using boolean functions, combine them into one shape. Sometimes this is a little tricky. If it doesn't look right I usually move the shape elements up and down and try out different combination modes.
- Use „Flatten" to simplify the shape. Just hit the button until Sketch tells you the shape can't be flattened any further. Not it should be the simplest possible representation of the desired shape.


Shared Layer Styles for Overrides
Back when symbols did not provide the possibility to override layer styles, you had to create color symbols, add them to your icon artboard and mark the icon shape as "Mask". This is not necessary anymore! You can easily define layer styles, the same way you define text styles and organize them in the same way. If you have not worked with layer styles yet, you can read about them in the Sketch documentation.
If you already have a default icon style, assign it to your simplified icon shape by selecting it from the Appearance-dropdown. If you do not have a dedicated style yet, select the desired color and create a new layer style by using the create button below the dropdown. You can now override the style with every layer style in your library or document.
In the future, you will not even need to do this — there will be a tint option for symbols available soon, allowing you to tint the whole symbol with a color of your choice. I still recommend using layer styles though, since they can be part of your styleguide, they can be named and organized accordingly and be changed in one place if needed.
Conclusion
I am currently very happy with how my Icon setup works, it meets exactly the needs we currently have in our workflow. The best thing is, that the developers can download the icons form Zeplin directly, so I don't even have to spend the time to select one or more artboards and click the export button. But I can also imagine, that there are different requirements for icons and illustrations that need another setup — I would love to hear what works for you and what experiences you made!
Also, this is my first time publishing on medium (and anywhere else, for that matter…). So — hello world ☺️Looking forward to your feedback!
How To Create Svg Icons
Source: https://uxdesign.cc/how-to-create-an-svg-ready-icon-library-in-sketch-a95e1a163a27
Posted by: pyattsawn1947.blogspot.com
0 Response to "How To Create Svg Icons"
Post a Comment